1994 Buick Park Avenue V6 Arbeiten / Reparaturen

Moderatoren: T-Hunter, Oliver

Re: 1994 Buick Park Avenue V6 Arbeiten / Reparaturen

Beitragvon Atschi-78-Caprice » Do Nov 22, 2018 18:16

      Bild


A/C Air conditioning / Klima

1,12 kg R134a


https://translate.google.de/translate?h ... rev=search

https://www.techchoiceparts.com/refrige ... ties/buick


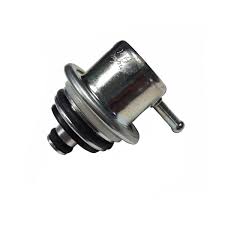
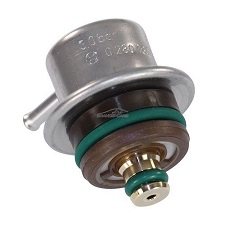
Benzindruckregler / REGULATOR. Fuel Injection

    GM 24500228
    GM 89054351
    0280160506
    0280160507
    037133035C
    2172114

    oem : Regeldruck Benzindruck : 3.0 Bar


https://www.wholesalegmpartsonline.com/ ... 00228.html


https://www.ebay.de/itm/0280160506-Bosc ... :rk:4:pf:0

    Regeldruck Benzindruck : 3.5 Bar


BOSCH : 0 280 160 597

EAN : 3165143126097

https://www.ebay.de/itm/BOSCH-KRAFTSTOF ... 1195.m1851


https://www.ebay.de/itm/VW-AUDI-SEAT-SK ... :rk:3:pf:0

Bild Bild
Zuletzt geändert von Atschi-78-Caprice am Do Mär 11, 2021 8:14, insgesamt 16-mal geändert.
    Bild Bild Bild
Benutzeravatar
Atschi-78-Caprice
Top-Fuel
 
Beiträge: 2234
Registriert: So Jan 24, 2010 18:26
Wohnort: DRESDEN

1994 Buick Park Avenue V6 Arbeiten / Reparaturen

Beitragvon Atschi-78-Caprice » Do Nov 22, 2018 18:27

Zuletzt geändert von Atschi-78-Caprice am Sa Apr 13, 2019 9:30, insgesamt 12-mal geändert.
    Bild Bild Bild
Benutzeravatar
Atschi-78-Caprice
Top-Fuel
 
Beiträge: 2234
Registriert: So Jan 24, 2010 18:26
Wohnort: DRESDEN

Re: 1994 Buick Park Avenue V6 Arbeiten / Reparaturen

Beitragvon Oliver » Fr Nov 23, 2018 1:24

Danke...Atschi, der Gerät sieht echt klassse aus...;-)
Könnte ich mir als Daily auch gut vorstellen...oder sowas als Tourist wäre noch besser.
Best in Life - is Landyacht drive!
Benutzeravatar
Oliver
Site Admin
 
Beiträge: 2289
Registriert: Mo Okt 23, 2006 1:12
Wohnort: Dresden

Re: 1994 Buick Park Avenue V6 Arbeiten / Reparaturen

Beitragvon Atschi-78-Caprice » So Nov 25, 2018 9:18

Danke Oli

naja ein bisschen gebaut werden muß aber noch :|

ist auch noch nicht zugelassen

läuft noch einiges an Öl aus

wie auch so gut wie alle Servoleitungen

die Tage ist ein Paket aus den USA gekommen

bekomme die Teile heute

mal sehen was alles mitgekommen ist

neues Tankeinfüllrohr

alle Servoleitungen

neue Luftstoßdämpfer hinten

neue Lagerführungsbuchen für Bremssattel vorn
Zuletzt geändert von Atschi-78-Caprice am So Apr 14, 2019 10:14, insgesamt 1-mal geändert.
    Bild Bild Bild
Benutzeravatar
Atschi-78-Caprice
Top-Fuel
 
Beiträge: 2234
Registriert: So Jan 24, 2010 18:26
Wohnort: DRESDEN

Re: 1994 Buick Park Avenue V6 Arbeiten / Reparaturen

Beitragvon Atschi-78-Caprice » Mo Dez 17, 2018 8:50

Zuletzt geändert von Atschi-78-Caprice am Mo Dez 31, 2018 15:55, insgesamt 3-mal geändert.
    Bild Bild Bild
Benutzeravatar
Atschi-78-Caprice
Top-Fuel
 
Beiträge: 2234
Registriert: So Jan 24, 2010 18:26
Wohnort: DRESDEN

Re: 1994 Buick Park Avenue V6 Arbeiten / Reparaturen

Beitragvon Klessi » Mo Dez 17, 2018 9:02

Hast du das Problem auch ? Ich hatte das mal so ähnlich beim Golf 2 :!:
Der Große vom Starsky !
Benutzeravatar
Klessi
Top-Fuel
 
Beiträge: 779
Registriert: Do Apr 09, 2009 19:13
Wohnort: Dresden

Re: 1994 Buick Park Avenue V6 Arbeiten / Reparaturen

Beitragvon Atschi-78-Caprice » Mi Dez 19, 2018 9:19


Ja habe ich auch diese Probleme ..........

das war auch der Grund des Vorbesitzers warum er das Auto verkauft hat

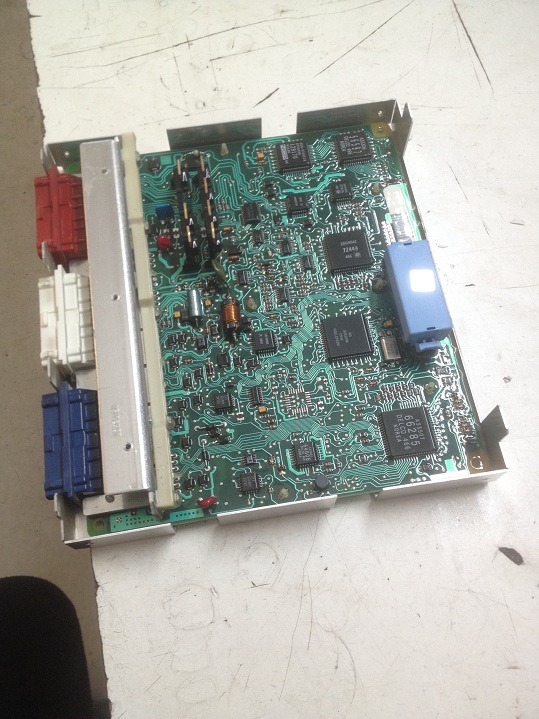
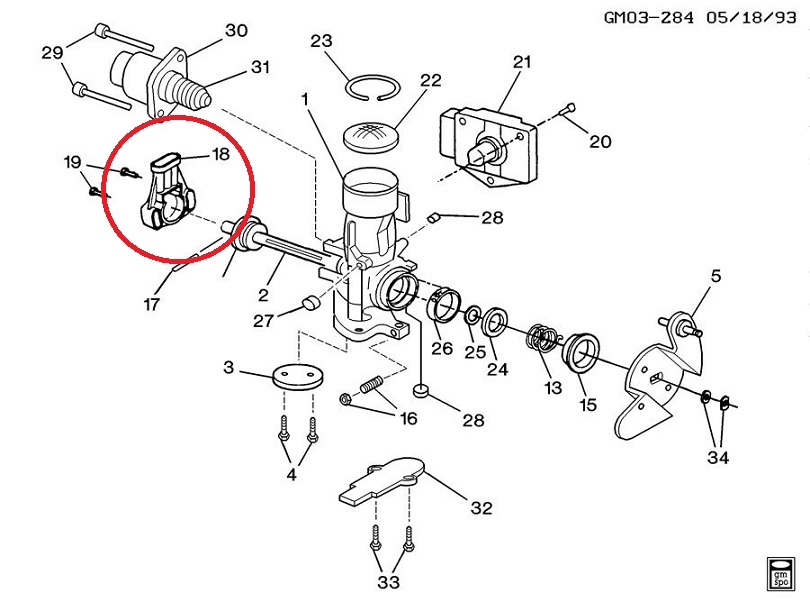
Ich bin bis jetzt bei dem : Drosselklappen Positions Sensor ( Throttle Position Sensor ) rausgekommen

immer wenn ich den abziehe läuft er besser , auch im kaltem Zustand dreht der Motor bis 3500 upm hoch

wenn ich den Stecker abziehe geht die Drehzahl runter auf so 750 - 1000 upm

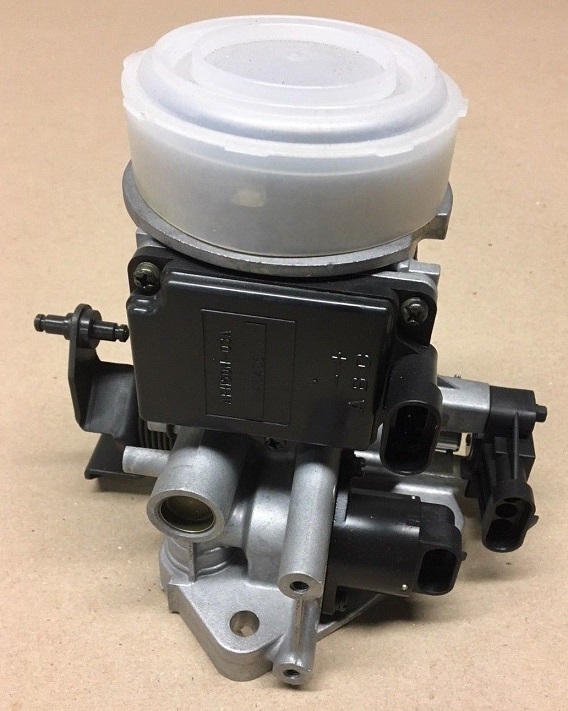
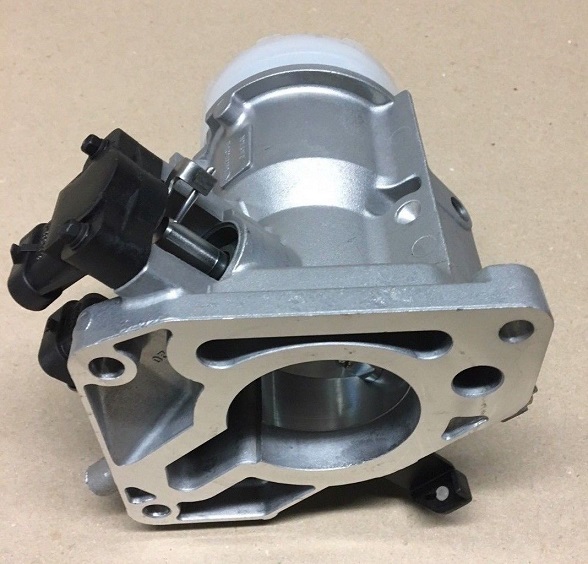
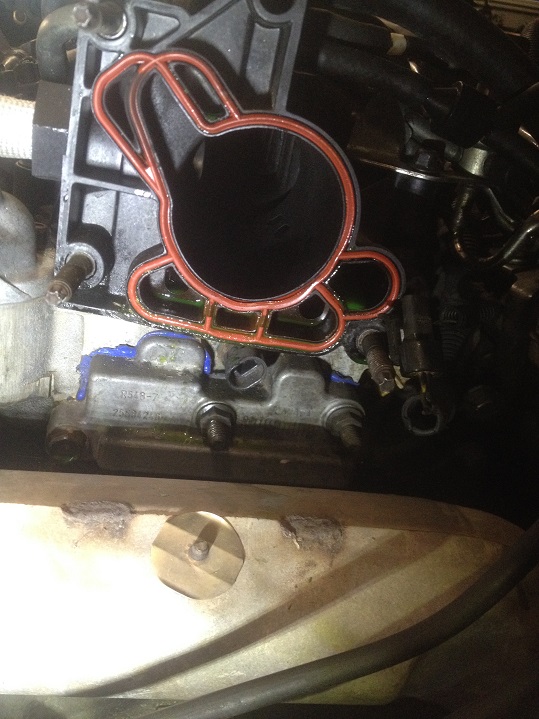
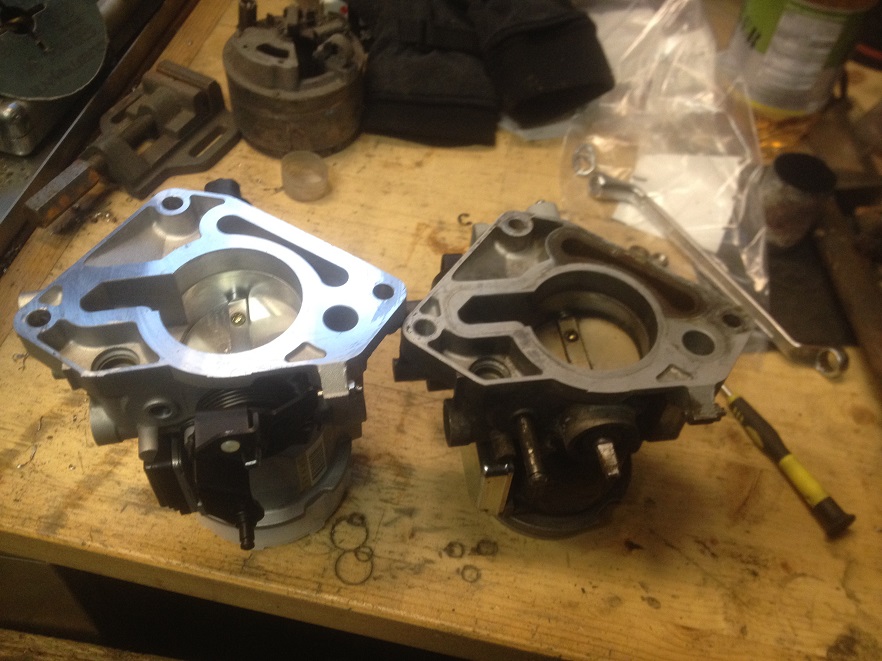
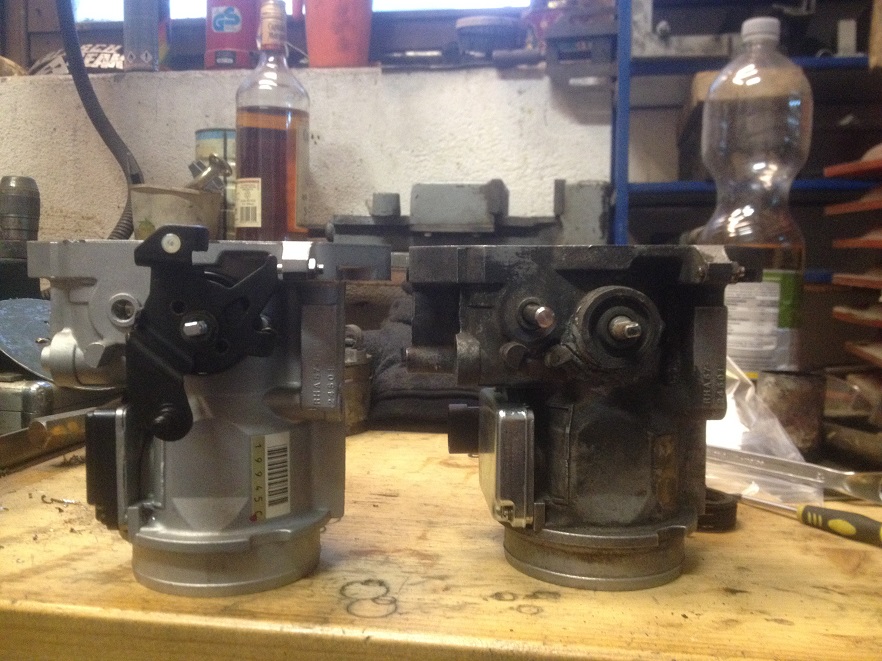
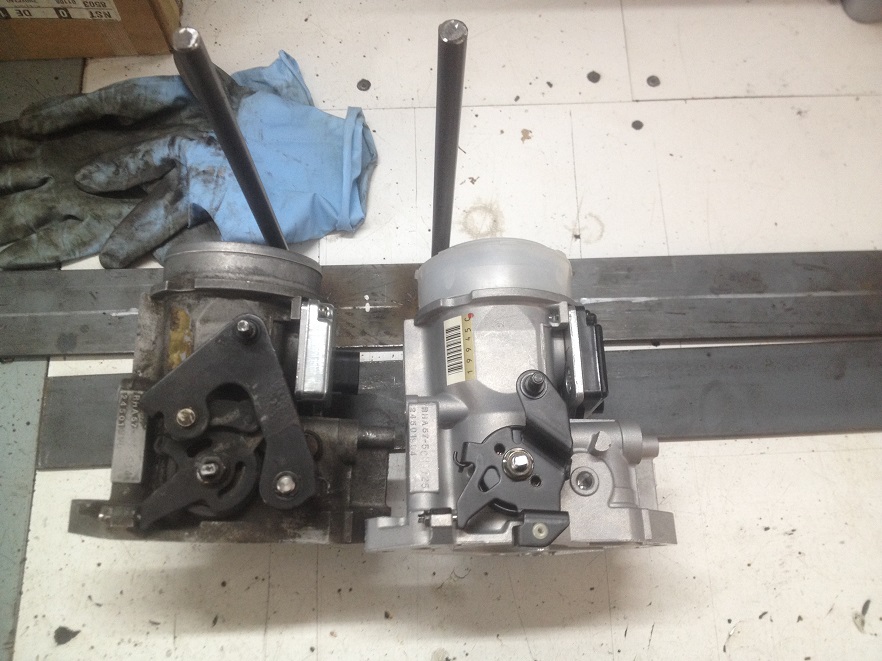
habe mir jetzt eine neue Drosselklappeneinheit bestellt

mit neuem Luftmassensensor / Drosselklappen Positions Sensor / Leerlaufsteller dran : 54 € mit allem ( Versand / Zoll )


http://www.samscars.com/mage15.html


How To Test The MAF Sensor ( Luftmassensensor ) GM 3.1L, 3.3L, 3.8L (1989-1996)

https://easyautodiagnostics.com/gm/3.8L ... f-sensor-1


https://www.autozone.com/repairguides/P ... 3f81acfe6d


    Throttle Body - GM ( 24501990 )
    fit for :

      Buick Lesabre 4DR CUSTOM 1994, 1995
      Buick Lesabre 4DR LIMITED 1994, 1995
      Buick Park Avenue 4DR Base 1994
      Oldsmobile 88 4DR Royale 1994
      Oldsmobile 88 4DR ROYALE LS 1994
      Oldsmobile 88 4DR ROYALE SERIES 1994
      Oldsmobile 98 4DR Base 1994
      Pontiac Bonneville 4DR SE 1994
      Pontiac Bonneville 4DR SSE 1994


https://www.ebay.de/itm/New-GM-OE-Throt ... Sw--Fa~JPA


https://www.ebay.de/itm/Premium-OE-Thro ... 2749.l2649


    Bild

    Bild


Bild


https://www.autopartskart.com/buick-par ... odule.html


https://xtronics.com/wiki/GM_ECU_eproms.html


https://www.autozone.com/repairguides/P ... 3f81acfdfb


https://www.autozone.com/repairguides/P ... 3f81acfea8


Bild

Bild


How To Test The MAF Sensor ( Luftmassenmesser / Sensor )GM 3.1L, 3.3L, 3.8L (1989-1996)

https://easyautodiagnostics.com/gm/3.8L ... f-sensor-1
Zuletzt geändert von Atschi-78-Caprice am So Nov 03, 2019 11:09, insgesamt 16-mal geändert.
    Bild Bild Bild
Benutzeravatar
Atschi-78-Caprice
Top-Fuel
 
Beiträge: 2234
Registriert: So Jan 24, 2010 18:26
Wohnort: DRESDEN

Drosselklappen Positions Sensor / Throttle Position Sensor

Beitragvon Atschi-78-Caprice » Fr Dez 28, 2018 14:02


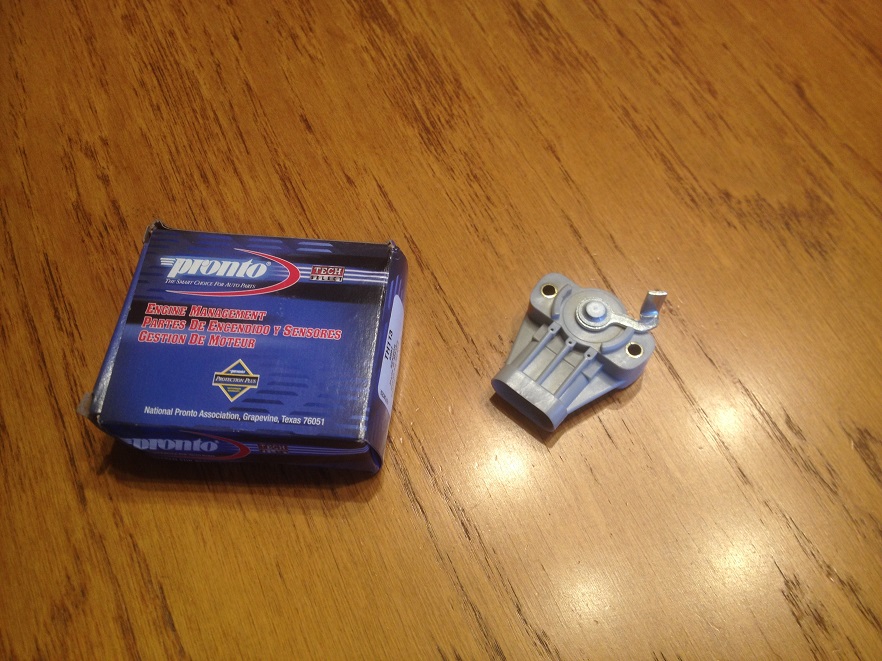
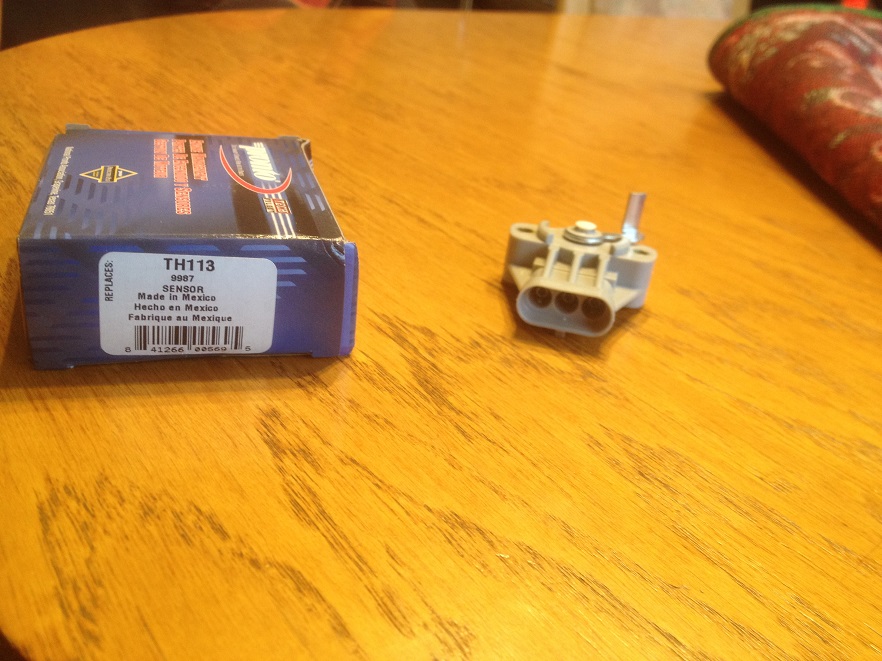
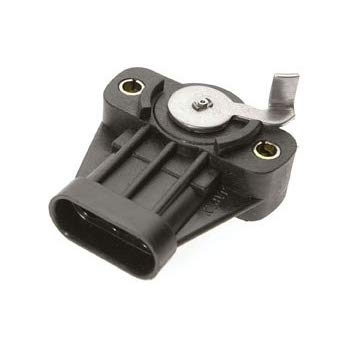
Heute ist der neue :

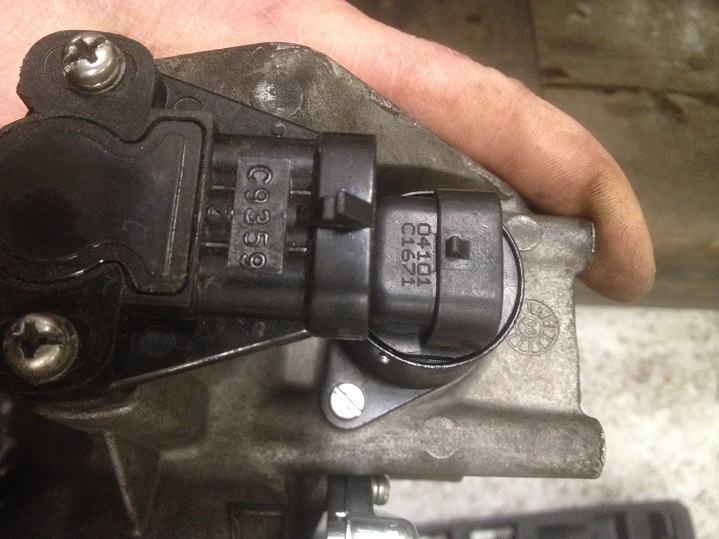
Drosselklappen Positions Sensor /
Throttle Position Sensor

Standard TH113 / 9987

EAN : 841266005695

https://www.rockauto.com/de/moreinfo.php?pk=41351&jsn=3


oem Part Nr.: GM 24502965

Preis : 50,16 € mit Versand / Zoll / Einfuhrsteuer

gekommen

https://www.wholesalegmpartsonline.com/ ... 02965.html


https://www.ebay.de/itm/Throttle-Positi ... 2749.l2649


TH113 / 9987 - Passend für folgende Fahrzeuge:

    BUICK CENTURY (1993 - 1996)
    BUICK LESABRE (1993 - 1995)
    BUICK PARK AVENUE (1993 - 1995)
    BUICK REGAL (1993 - 1995)
    BUICK RIVIERA (1993 - 1995)
    BUICK SKYLARK 1993
    CHEVROLET LUMINA APV (1993 - 1995)
    OLDSMOBILE 88 (1993 - 1995)
    OLDSMOBILE 98 (1992 - 1995)
    OLDSMOBILE ACHIEVA ( 1993 )
    OLDSMOBILE CUTLASS CIERA (1993 - 1996)
    OLDSMOBILE SILHOUETTE (1993 - 1995)
    PONTIAC BONNEVILLE (1993 - 1995)
    PONTIAC GRAND AM ( 1993 )
    PONTIAC TRANS SPORT (1993 - 1995)

Man kann ihn auch in Deutschland kaufen für günstige : 124,10 €

https://www.ebay.de/itm/Drosselklappens ... :rk:4:pf:0


Bild

Bild


Bild


How To Test The GM 3.8L Throttle Position Sensor (TPS)

https://easyautodiagnostics.com/gm/3.8L ... n-sensor-2

How To Test The MAF Sensor GM 3.1L, 3.3L, 3.8L (1989-1996)

https://easyautodiagnostics.com/gm/3.8L ... f-sensor-1


https://troubleshootmyvehicle.com/gm/3. ... f-sensor-1


Probleme 3.8l Test Diagnose :

https://troubleshootmyvehicle.com/gm/3. ... articles-1

https://translate.googleusercontent.com ... 5QzSgeTwXA


http://webcache.googleusercontent.com/s ... clnk&gl=de


Zuletzt geändert von Atschi-78-Caprice am Di Jan 01, 2019 10:03, insgesamt 1-mal geändert.
    Bild Bild Bild
Benutzeravatar
Atschi-78-Caprice
Top-Fuel
 
Beiträge: 2234
Registriert: So Jan 24, 2010 18:26
Wohnort: DRESDEN

Re: 1994 Buick Park Avenue V6 Arbeiten / Reparaturen

Beitragvon Atschi-78-Caprice » Di Jan 01, 2019 9:51


https://sites.google.com/site/chelectri ... amp-switch


Folgende Fehler zeigte der : Snap On Tester :

Fehler 1 : TP - Sensor

    Drosselklappen Positions Sensor /
    Throttle Position Sensor

    TH113
    Bild


Fehler 2 :


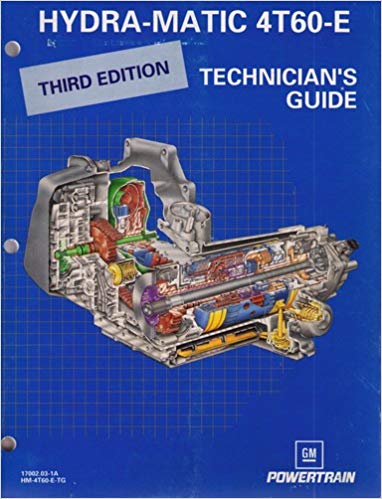
    Automatik Getriebe : 4T60-E

    Probleme


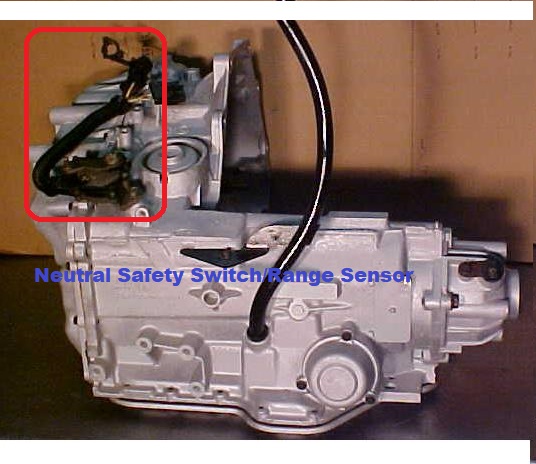
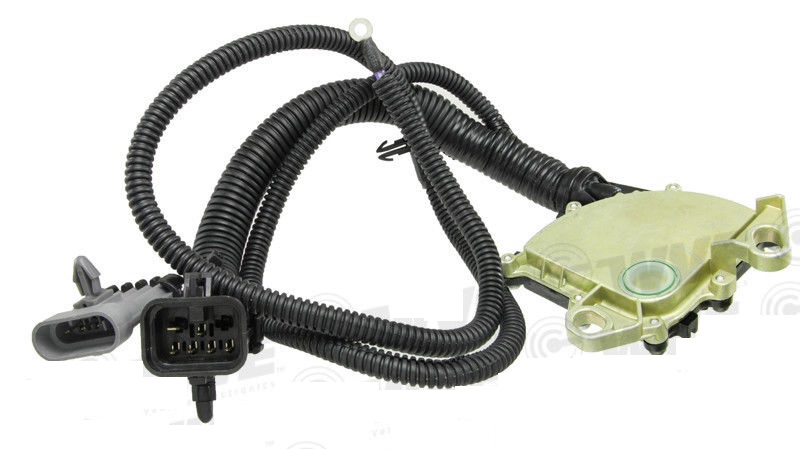
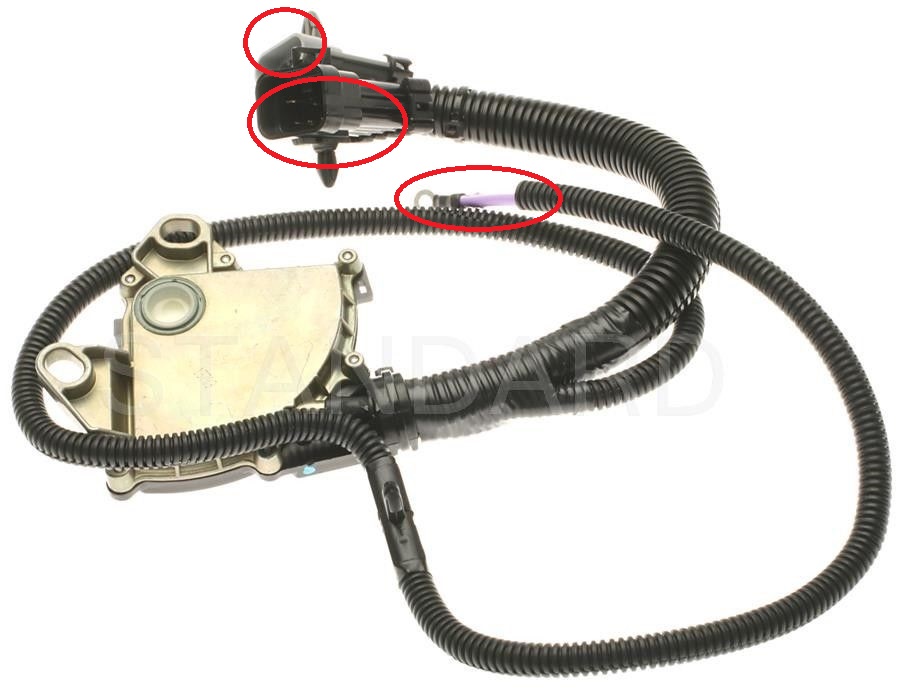
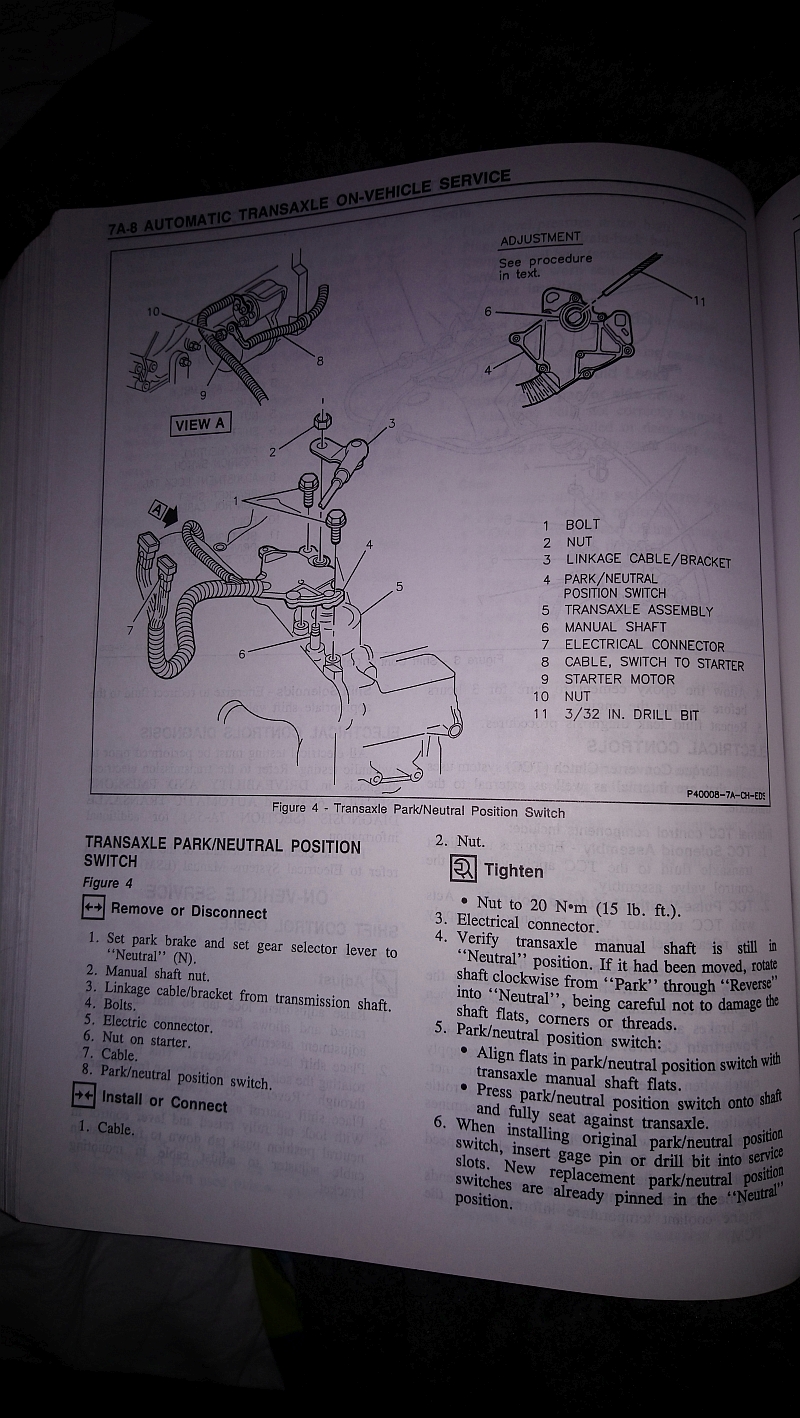
      Transmission Range Switch Circuit - Neutral Safety Switch/Range Sensor

      1994 Buick Park Avenue 3.8 4T60-E oem Nr.: 1994363


    Bild


https://www.rockauto.com/de/moreinfo.php?pk=97646&jsn=6


https://www.rockauto.com/de/moreinfo.ph ... 9810&jsn=9


https://www.rockauto.com/de/moreinfo.ph ... 9810&jsn=8


Bild

mit 3 Kabeln hatte meiner verbaut , das 3 Kabel geht mit an den Anlasser

Bild


Bild


https://www.ebay.de/itm/Neutral-Safety- ... rk:36:pf:0

https://www.ebay.de/itm/Neutral-Safety- ... rk:28:pf:0

https://www.ebay.de/itm/Neutral-Safety- ... :rk:2:pf:0


https://www.amazon.com/Hydra-Matic-4T60 ... B001CNJ366


Bild


http://www.charlietranny.com/4T60E.htm


http://www.charlietranny.com/GM.htm
Zuletzt geändert von Atschi-78-Caprice am Fr Mär 15, 2019 7:39, insgesamt 7-mal geändert.
    Bild Bild Bild
Benutzeravatar
Atschi-78-Caprice
Top-Fuel
 
Beiträge: 2234
Registriert: So Jan 24, 2010 18:26
Wohnort: DRESDEN

Re: 1994 Buick Park Avenue V6 Arbeiten / Reparaturen

Beitragvon Atschi-78-Caprice » Di Jan 01, 2019 18:12

Zuletzt geändert von Atschi-78-Caprice am So Feb 03, 2019 11:18, insgesamt 1-mal geändert.
    Bild Bild Bild
Benutzeravatar
Atschi-78-Caprice
Top-Fuel
 
Beiträge: 2234
Registriert: So Jan 24, 2010 18:26
Wohnort: DRESDEN

Re: 1994 Buick Park Avenue V6 Arbeiten / Reparaturen

Beitragvon Atschi-78-Caprice » Sa Jan 26, 2019 11:02

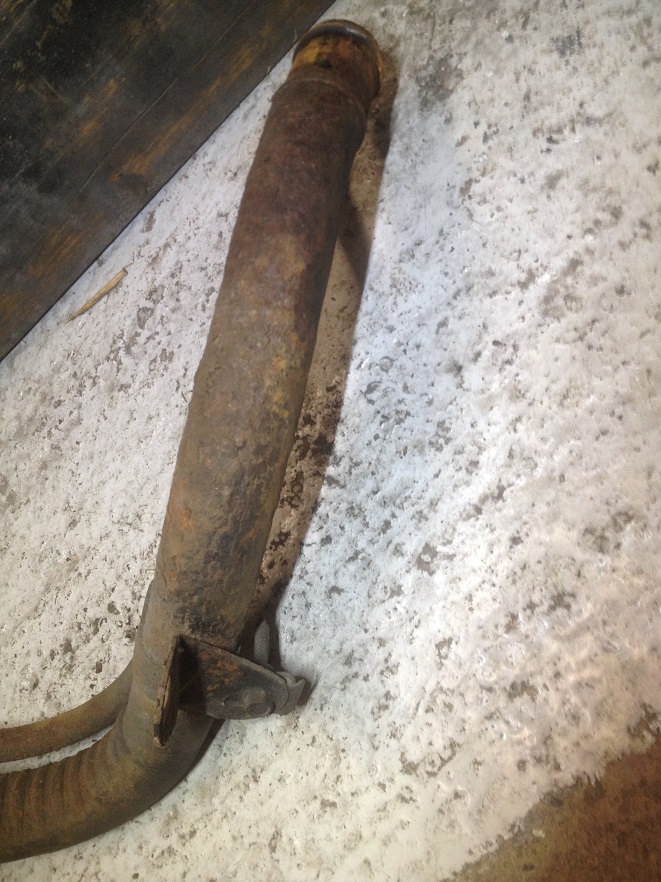
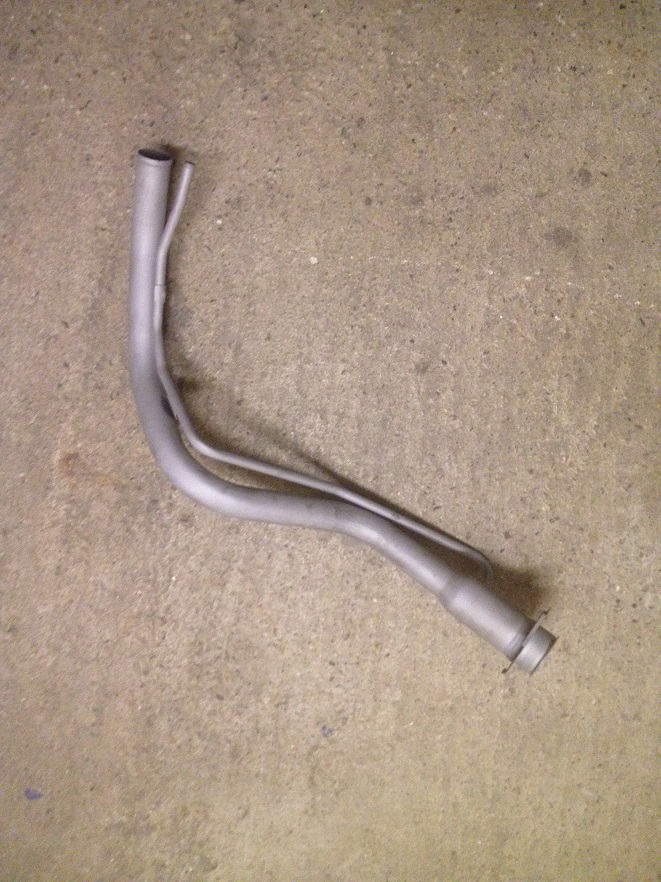
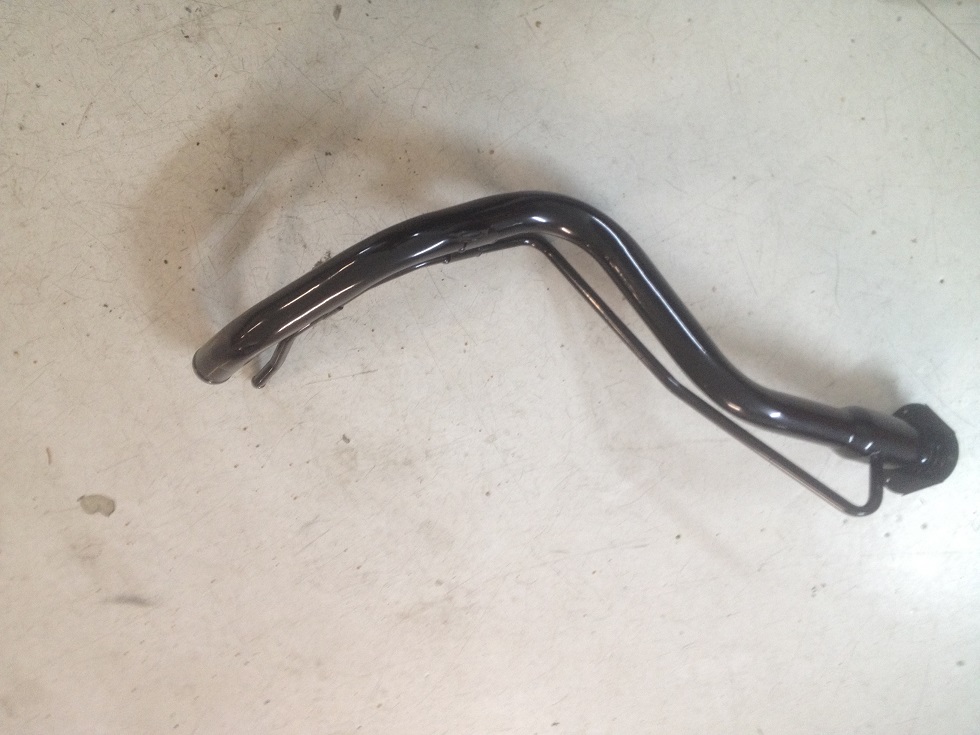
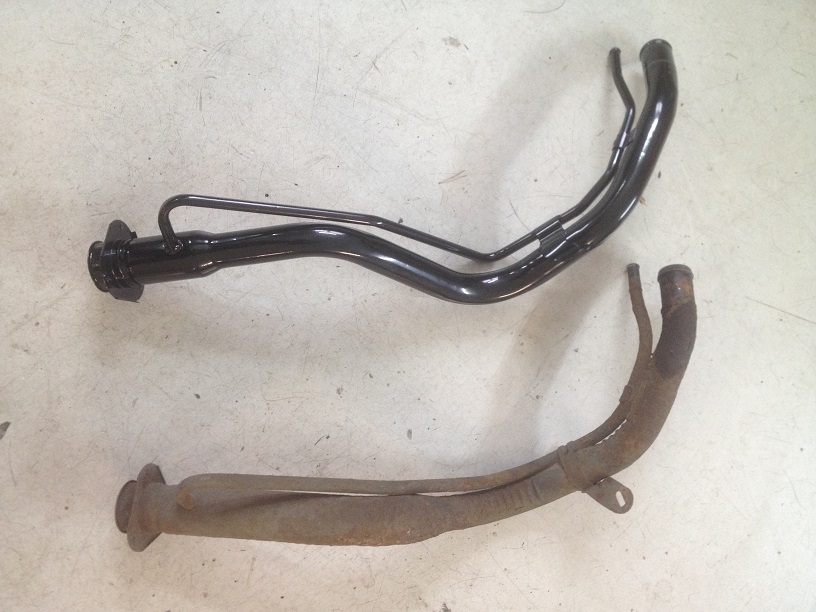
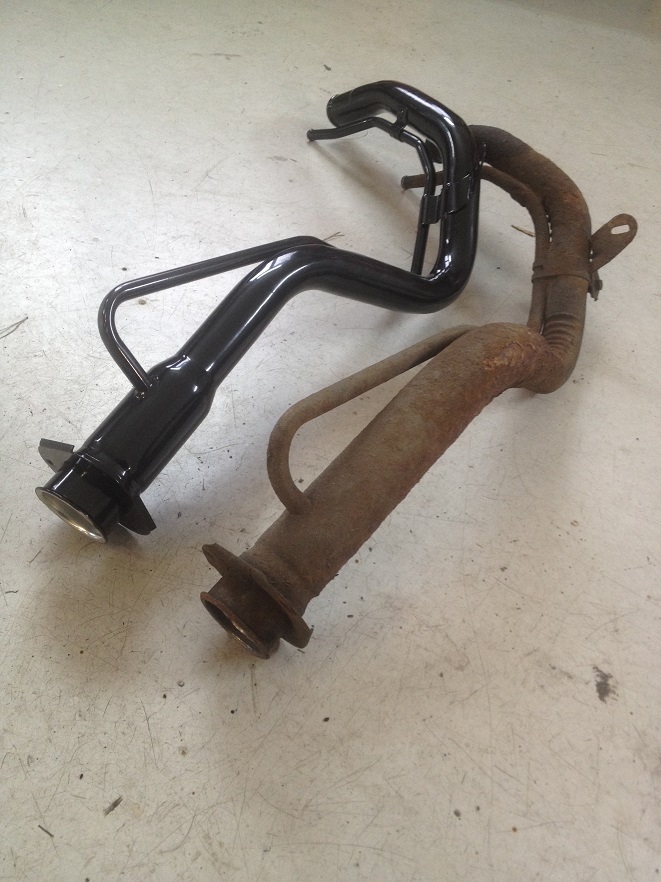
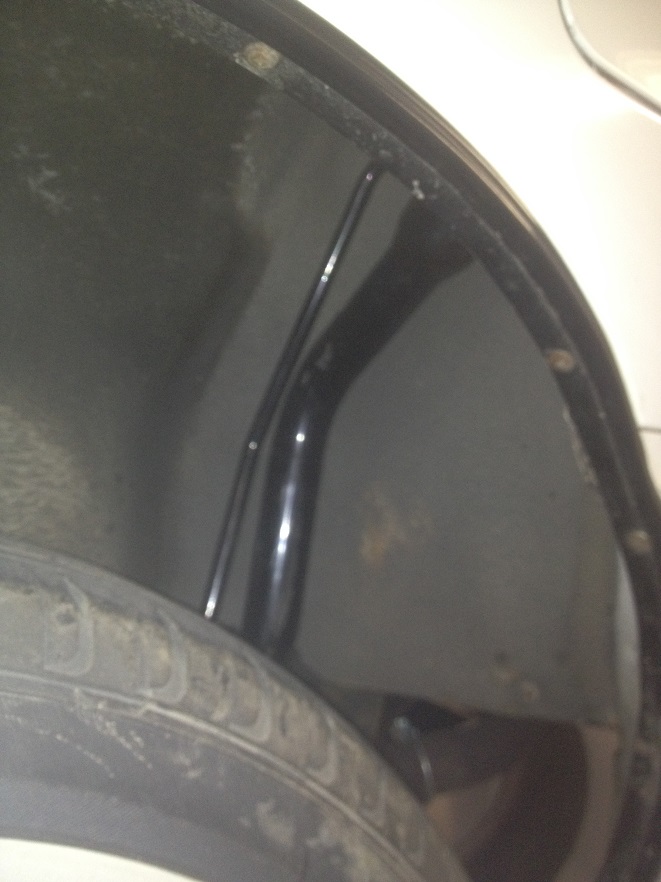
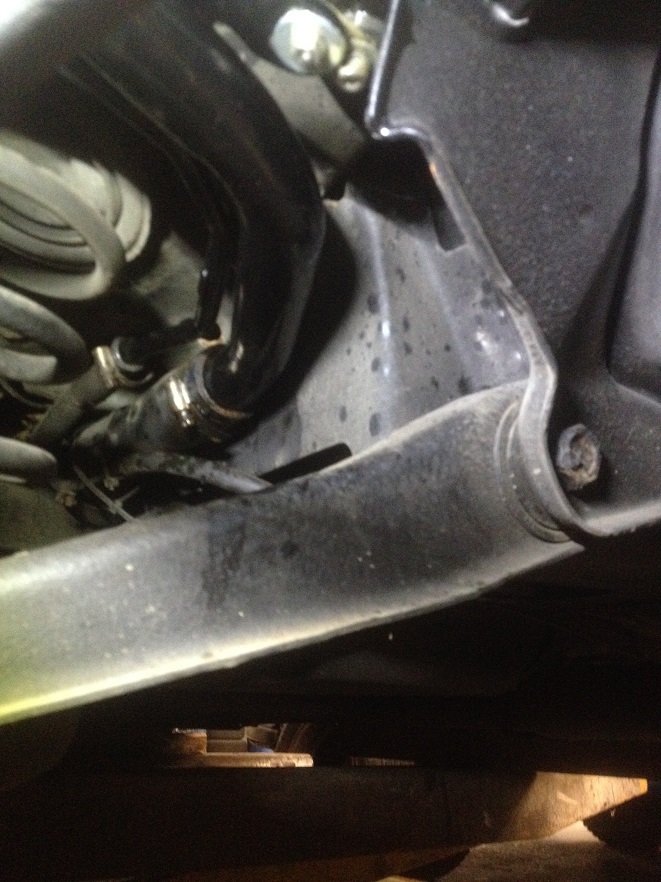
Das neue Tankeinfüllstutzen Rohr ist jetzt auch vom pulverbeschichten wieder da


das alte Rohr

Bild


das neue Rohr sandgstrahlt

Bild


Bild


Bild


Bild


Bild


Bild
Zuletzt geändert von Atschi-78-Caprice am Sa Sep 18, 2021 9:21, insgesamt 6-mal geändert.
    Bild Bild Bild
Benutzeravatar
Atschi-78-Caprice
Top-Fuel
 
Beiträge: 2234
Registriert: So Jan 24, 2010 18:26
Wohnort: DRESDEN

Re: 1994 Buick Park Avenue V6 Arbeiten / Reparaturen

Beitragvon Atschi-78-Caprice » So Feb 03, 2019 11:50

Momentan bin ich noch am Teile wechsel

und am warten auf Teile aus den USA :?

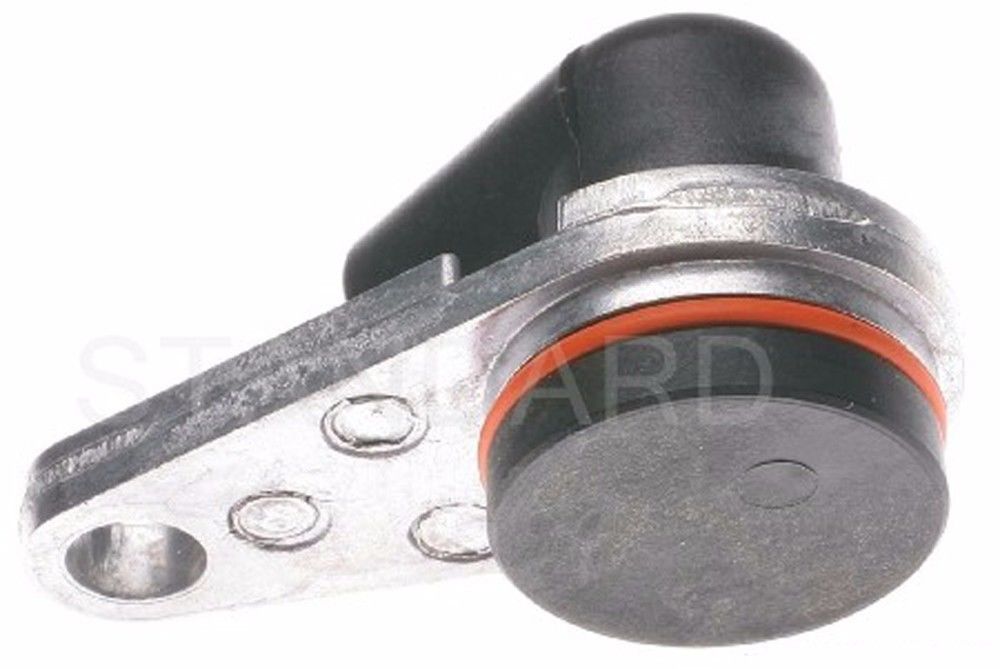
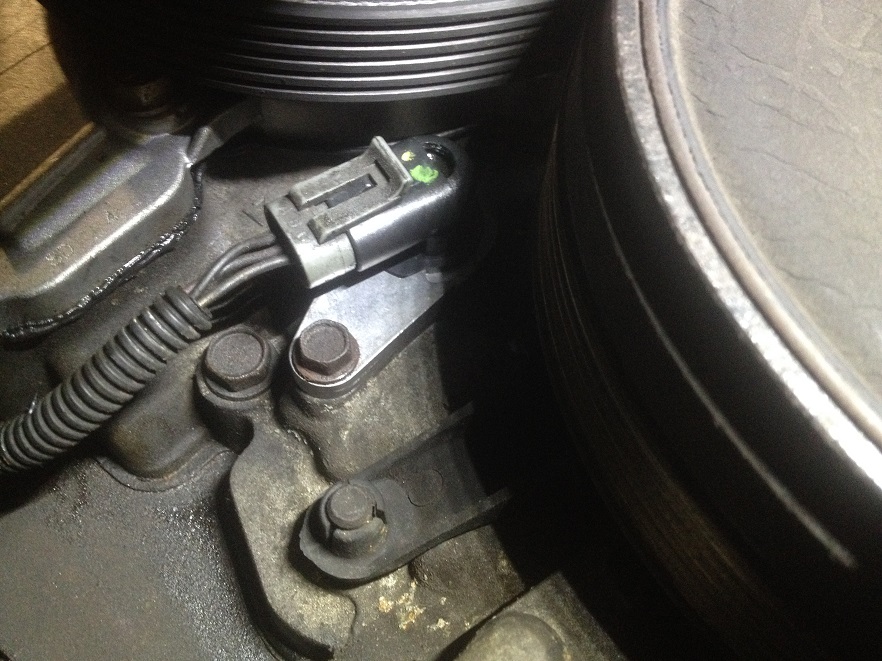
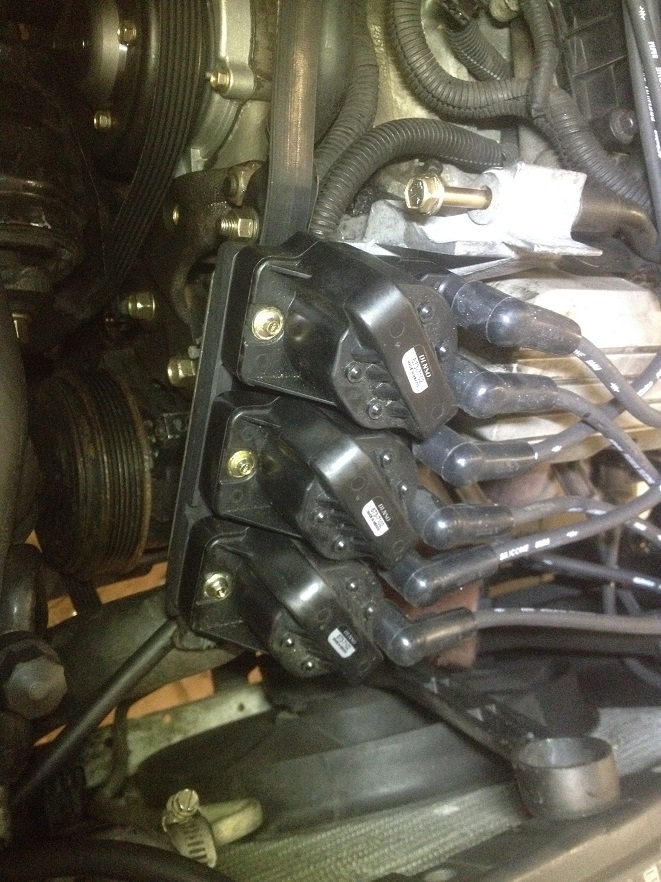
Nockenwellensensor habe ich jetzt getauscht


Anleitung
: https://www.2carpros.com/questions/buic ... aft-sensor


Bild

Bild


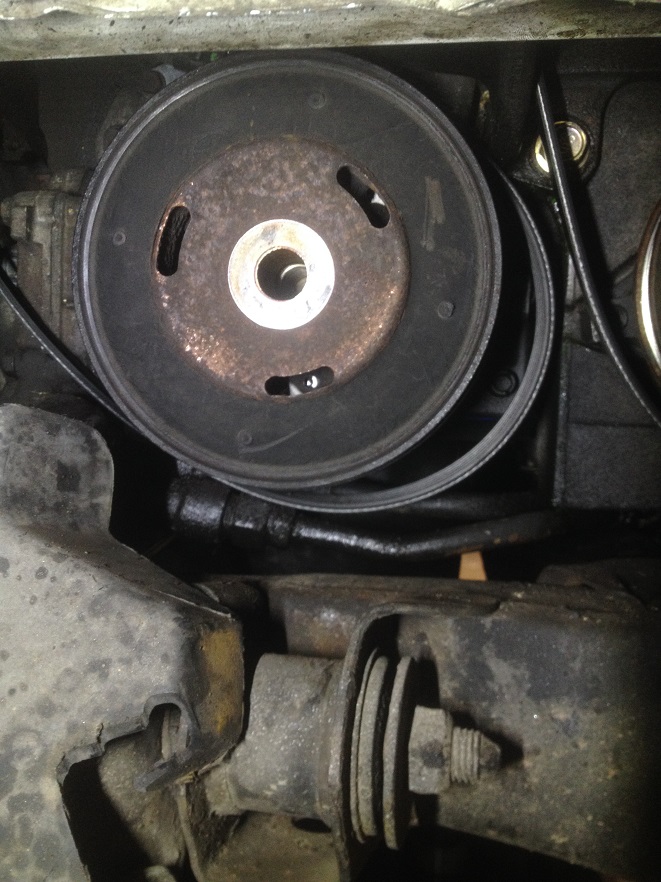
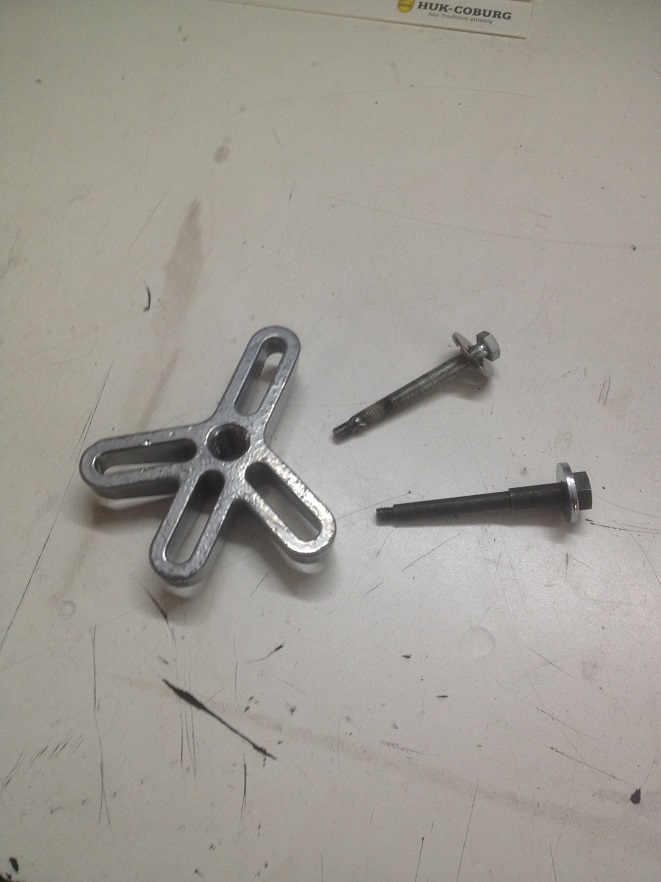
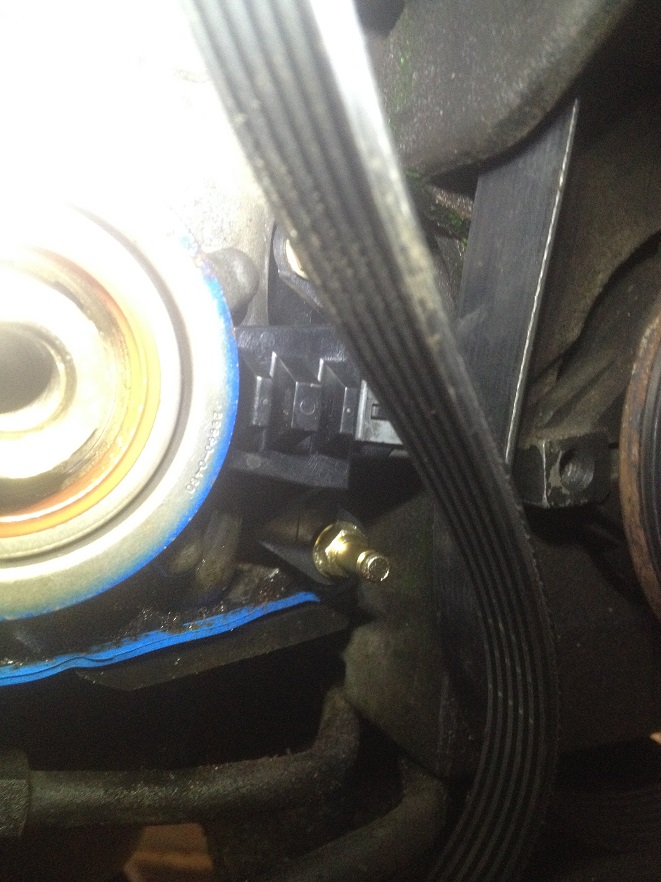
jetzt ist noch der Kurbelwellensensor dran


    Bild


Bild


Bild

Bild

Bild

Bild

Bild

Bild


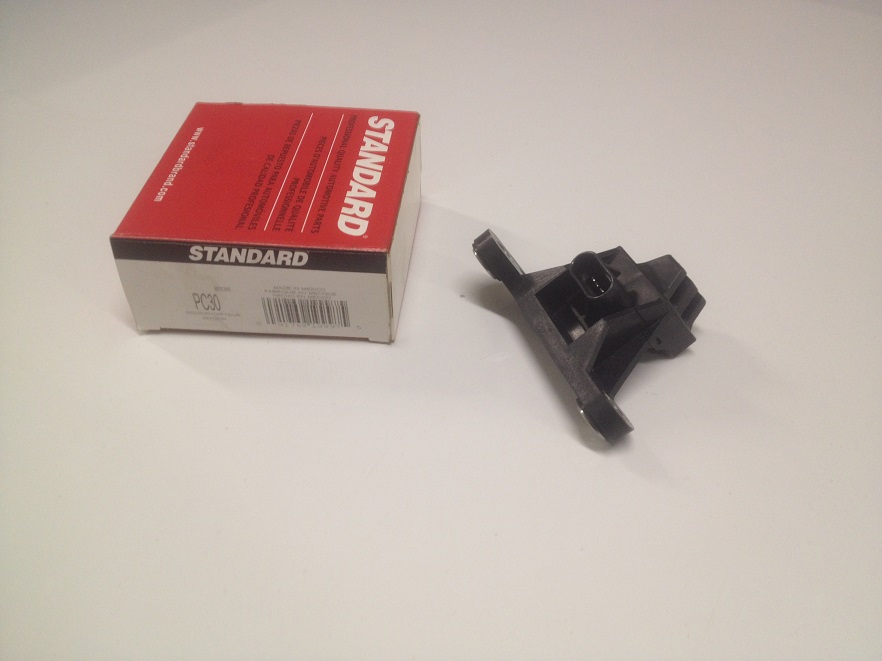
Neuer Kurbelwellen Sensor PC 30

Bild


Bild


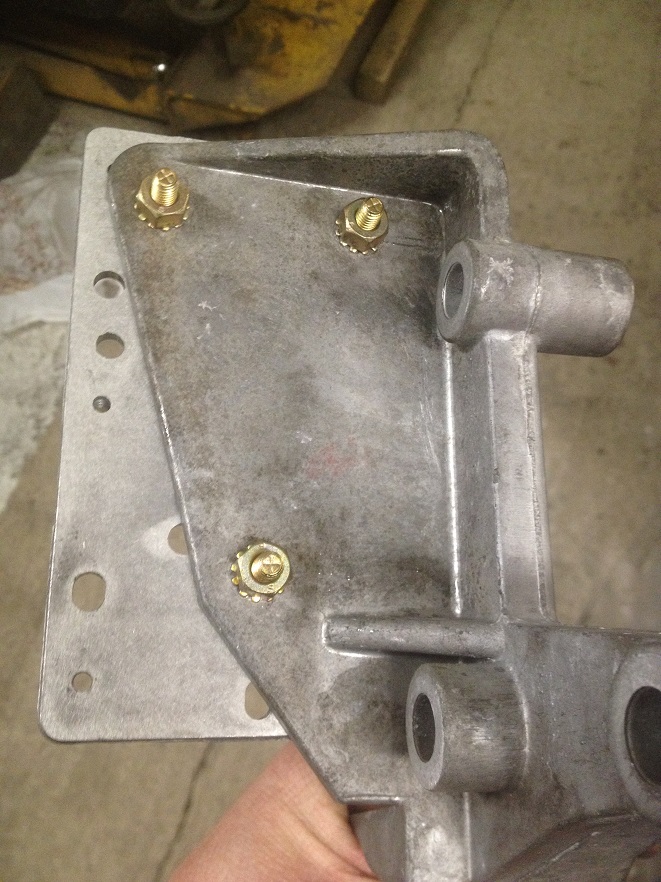
Habe alles gleich gereinigt

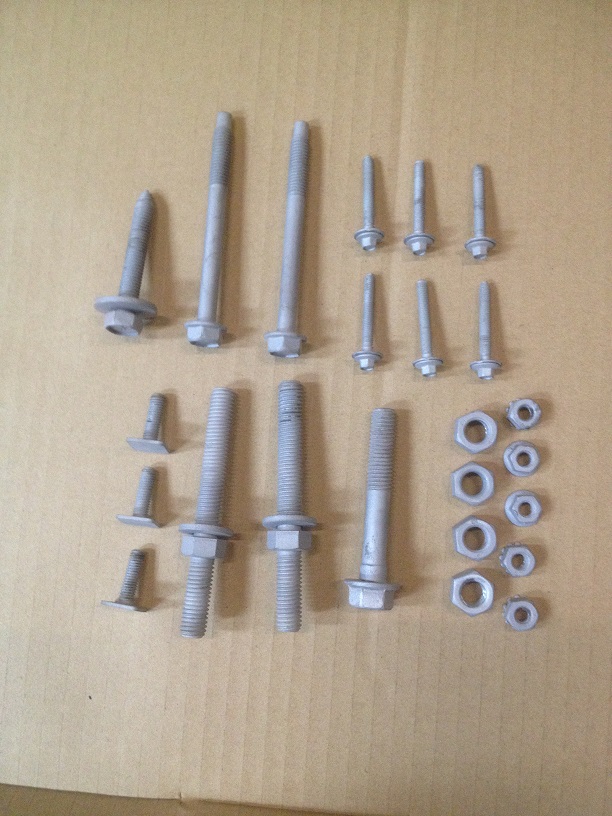
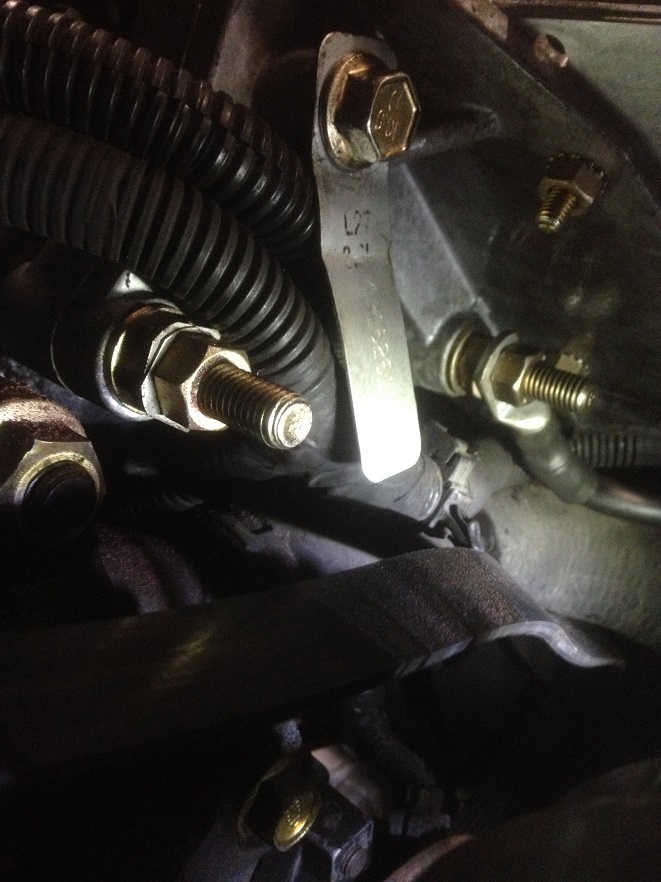
und semtliche Schrauben gesandstrahlt und neu verzinken lassen

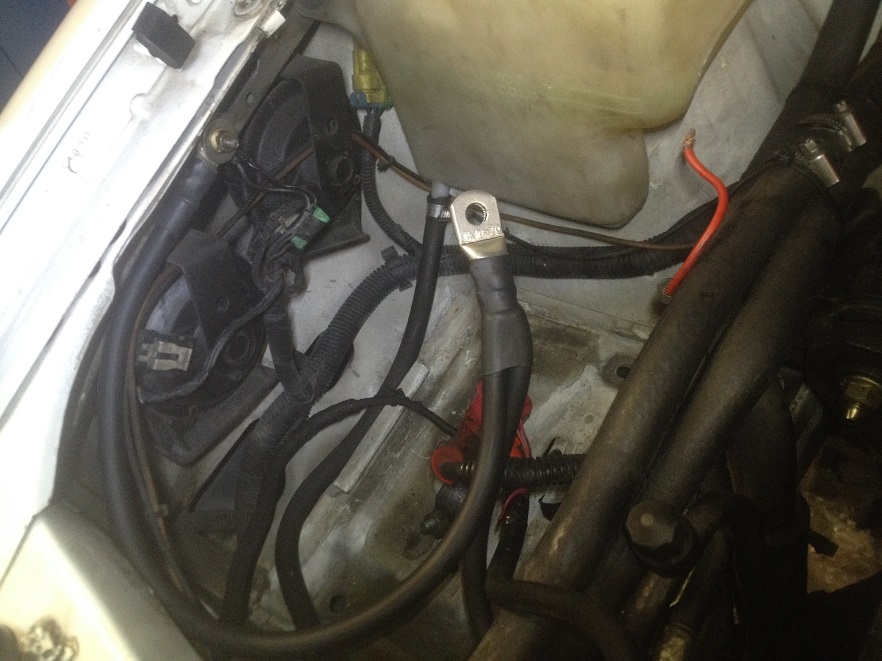
mir wurde gesagt das diese Fahrzeuge über die Jahre gern mal Masse-Probleme haben auf grund von Korrosion


Bild


Bild

Bild

Bild

Bild


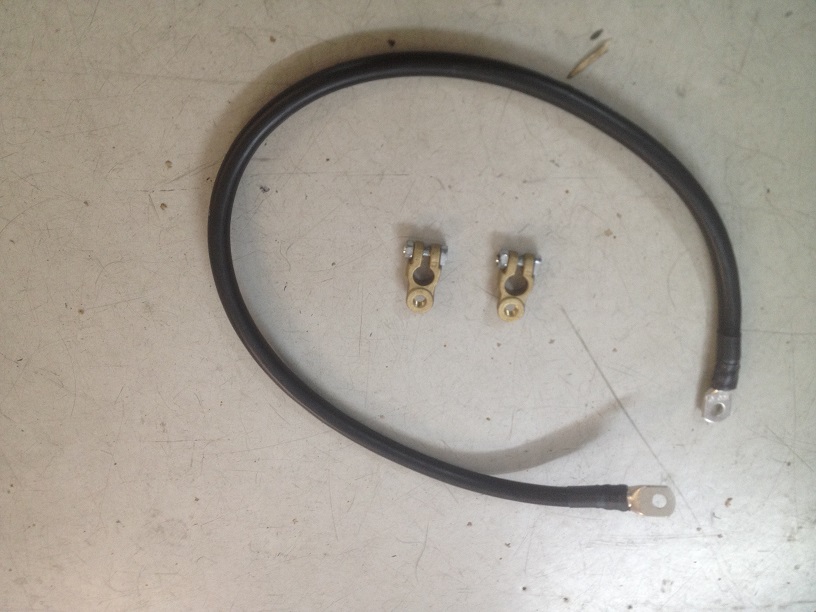
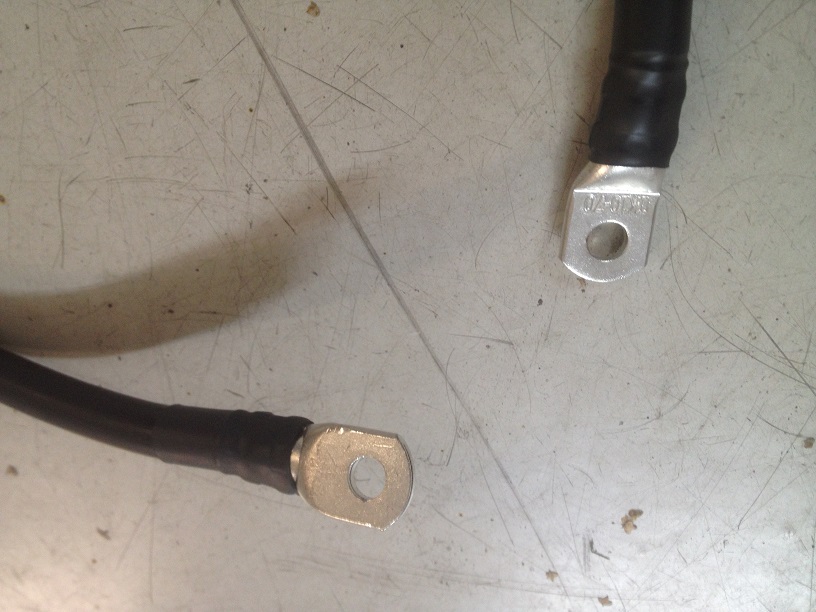
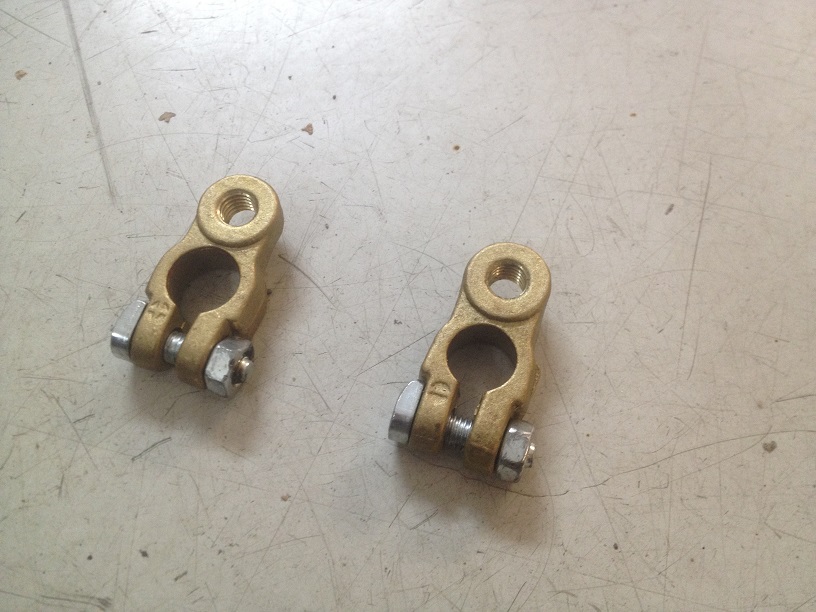
Anlasserkabel habe ich auch gleich neu gemacht 70 mm²


Bild


Bild


Bild
Zuletzt geändert von Atschi-78-Caprice am So Apr 14, 2019 10:19, insgesamt 11-mal geändert.
    Bild Bild Bild
Benutzeravatar
Atschi-78-Caprice
Top-Fuel
 
Beiträge: 2234
Registriert: So Jan 24, 2010 18:26
Wohnort: DRESDEN

Re: 1994 Buick Park Avenue V6 Arbeiten / Reparaturen

Beitragvon Atschi-78-Caprice » So Feb 17, 2019 13:34

Ja leider ist der Fehler immer noch nicht behoben

immer noch das selbe Problem :(

trotz der vielen neuen Teile

    Bild Bild Bild
Benutzeravatar
Atschi-78-Caprice
Top-Fuel
 
Beiträge: 2234
Registriert: So Jan 24, 2010 18:26
Wohnort: DRESDEN

Re: 1994 Buick Park Avenue V6 Arbeiten / Reparaturen

Beitragvon Atschi-78-Caprice » Mo Mär 04, 2019 17:36

einstellbarer LED Blinkgeber


https://www.ebay.de/itm/CARCHET-Blinkre ... ctupt=true


https://www.ebay.de/itm/LED-Blinkgeber- ... 2749.l2649


Bild


Maße: ca. 5 x 3 x 3 cm
Norm: 12,8V, 0,1W-150W c/w
Produktbeschreibung: Blinkrelais E.L.B Typ, 3 Pin, verstellbar
    Bild Bild Bild
Benutzeravatar
Atschi-78-Caprice
Top-Fuel
 
Beiträge: 2234
Registriert: So Jan 24, 2010 18:26
Wohnort: DRESDEN

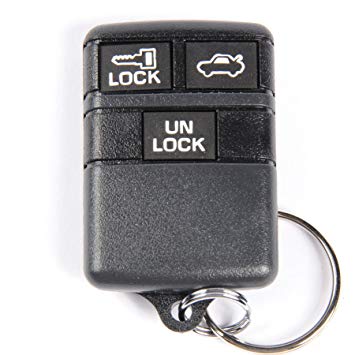
Transmitter 25602667 BUICK Keyless Entry

Beitragvon Atschi-78-Caprice » So Apr 07, 2019 7:33

Was noch rum spinnt ist die Motor-öl-druck-anzeige

Wenn man Zündung an macht alles Okay , Zeiger bei 0

wenn man Motor startet Zeiger geht voll auf Anschlag


Bild

Bild

    Öldrucksensor ist bereits getauscht , alles neu
    25535479


    Bild


    Bild


    Bild


Aus einem anderen Forum !
( https://www.motor-talk.de/forum/buick-p ... st50186788 )


BUICK verriegeln und Öffnen mit Blinker bestätigung und Hup Ton :

Ich hab da auch nochmal eine Frage an die Experten.

In meiner Bedienungsanleitung (Englisch) steht, dass man einstellen kann, dass beim Verriegeln/Entriegeln per Fernbedienung die Blinker leuchten und/oder die Hupe kurz ertönt.

Leider funktioniert der Vorgang nicht bei mir , wie in der Anleitung beschrieben

* (Lock - Taste der Tür gedrückt halten und dann auf der Fernbedienung die Taste Kofferraumöffner drücken).

Hat jemand bei seinem Park Avenue optische /akkustische Rückmeldung für die ZV, oder wurde das bei der Europaversion kastriert ?

Und falls ja, wie bekomme ich das wieder ?

Steuergerät der US Version?

___________________________________________________________________________________________________________________________


Hier Fernbedienung BUICK 25602667 OEM BUICK CHEVY KEY Keyless Entry Remote Alarm 25602667


https://picclick.com/Pair-1994-1997-New ... 95120.html


https://www.ebay.de/itm/OEM-GM-25602667 ... SwTWBamKbu


https://www.ebay.de/itm/2-NEW-2560668-T ... Sw5vxcWcDS


Fernbedienung programmieren


https://www.programyourremote.com/class ... e-133.aspx

Most remotes can be self-programmed. If these procedures do not work, you must have your remote programmed by a professional automotive locksmith or dealership.

Procedure #1 (92 Century)

Obtain all remote transmitters for this vehicle.
1. Open trunk and locate the Programming Connector by the left side wheel well. Programming Connector may be behind the trim or carpet and will not be connected to anything. It will be a plastic connector with two wires running from it.
2. Ensure that there are two metal pins or terminals in the connector. Jump one pin to the other. This can be done with a jumper wire or a paper clip bent. Once jumped properly the door locks will cycle to lock then unlock.
3. Vehicle is now in programming mode. Press unlock on the remote once. When accepted the door locks will cycle again to lock then unlock.
4. Repeat step 3 when programming a second remote.
5. Programming is now complete. Remove jumper wire from Programming Connector and test remotes to ensure proper programming.

Procedure #2 (92-93 LeSabre, 91-93 Park Avenue)

    Bild

PROGRAMMIERUNG VON CHEVROLET 1996

1.Lokalisieren Sie den Data Link Port.
Es befindet sich unter dem Armaturenbrett auf der Fahrerseite.
Stellen Sie sicher, dass Sie die Pins 8 und 4 kennen.


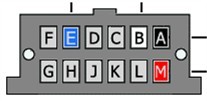
(Beachten Sie, dass der Anschluss oben breiter ist.) Ihr OBDII-Anschluss enthält keine Nummern. Verwenden Sie dieses Diagramm als Referenz.


    Bild


2. Stellen Sie sicher, dass sich in den Klemmen 8 und 4 Metallkontaktstifte befinden. Verbinden Sie 8 bis 4 mit einem geeigneten Überbrückungskabel (lassen Sie das Überbrückungskabel während des Programmiervorgangs angeschlossen). Stellen Sie sicher, dass Sie wissen, welche Terminals 8 und 4 sind. Das Fahrzeug verriegelt und entriegelt daraufhin die Türen, um den Programmiermodus zu aktivieren.

3. Halten Sie die Tasten LOCK und UNLOCK am ersten zu programmierenden Sender gleichzeitig gedrückt. Nach ca. 15 Sekunden verriegelt und entriegelt das Fahrzeug die Türen. Lassen Sie die Tasten am Sender los.

4. Wiederholen Sie innerhalb einer Minute den vorherigen Schritt für die verbleibenden Sender, die programmiert werden sollen.

5.Entfernen Sie das am OBDII-Port angebrachte Überbrückungskabel


__________________________________________________________________________________________________
1. Locate the Data Link Connector (DLC) underneath the driver's side dashboard. Please refer to the diagram above to determine the G and A cavity. The letters will not appear on the connector. They are on the diagram for ease of reference.
2. Connect cavity G with cavity A using a fused jumper wire. Your vehicle will respond by locking and unlocking the door locks within 2 seconds.
3. Press any button 3 times in successtion on first remote to be programmed. Locks will lock and unlock verifying remote was programmed.
4. Press any button 3 times in succession on second remote to be programmed if applicable. Locks will lock and unlock to verify remote was programmed.
5. Remove jumper wire and test remote(s)

OR

1. Locate the Data Link Connector (DLC) underneath the driver's side dashboard. Please refer to the diagram above to determine the G and A cavity. The letters will not appear on the connector. They are on the diagram for ease of reference.
2. Connect cavity G with cavity A using a fused jumper wire. Your vehicle will respond by locking and unlocking the door locks within 2 seconds.
3. Press the UNLOCK button once on first remote to be programmed. Locks will lock and unlock verifying remote was programmed.
4. Press the UNLOCK button on second remote to be programmed if applicable. Locks will lock and unlock to verify remote was programmed.
5. Remove jumper wire and test remote(s)

    Procedure #3 (94-95 LeSabre, 94-95 Park Avenue, 95 Riviera)

    Bild

1. Locate the Data Link Port. It is located under drivers side dash. You may need to lay on the floor and look up under the dash to see it. Be sure you know which ports are 8 and 4. Notice the port is wider on the top row. If you are looking at the port with the wide row on top and the narrow row on bottom, Port 1 will be in the upper left corner and port 8 in the upper right corner. Be sure there are metal pins inside ports 8 and 4. Please refer to the diagram above to locate the proper pins. The numbers are not on the connector, they are only for reference.
2. Connect pin 8 to pin 4 with a suitable jumper wire. Any short piece of wire will work fine. A paper clip bent in the shape of a U will work perfect. (leave the jumper wire connected throughout the programming procedure).
3. Insert key into the ignition and turn the ignition cylinder to the ON position. The vehicle will respond by locking and unlocking the doors to indicate vehicle has entered programming mode.
4. Press and hold both the LOCK and UNLOCK buttons together on the first remote to be programmed. After about 15 seconds, the vehicle will respond by locking and unlocking the doors. Release the buttons on the remote.
5. Within one minute, repeat step 4 on all additional remotes including working ones to be programmed.
6. Remove the jumper wire connected to the Data Link Port.

OR

1. Locate the Data Link Port. It is located under drivers side dash. You may need to lay on the floor and look up under the dash to see it. Be sure you know which ports are 8 and 4. Notice the port is wider on the top row. If you are looking at the port with the wide row on top and the narrow row on bottom, Port 1 will be in the upper left corner and port 8 in the upper right corner. Be sure there are metal pins inside ports 8 and 4. Please refer to the diagram above to locate the proper pins. The numbers are not on the connector, they are only for reference.
2. Connect pin 8 to pin 4 with a suitable jumper wire. Any short piece of wire will work fine. A paper clip bent in the shape of a U will work perfect. (leave the jumper wire connected throughout the programming procedure). The vehicle will respond by locking and unlocking the doors to indicate vehicle has entered programming mode.
3. Press the Unlock button on the remote. The door locks will cycle again lock to unlock.
4. repeat step 3 to program a second transmitter.
5. Remove the jumper wire connected to the Data Link Port. Programming is now complete, test remotes to ensure proper programming.

    Procedure #4 (93 Century)

Obtain all remote transmitters for this vehicle.
1. Access green programming connector in LH side of trunk (drivers side). Programming connector will not be connected to anything. It will have a plug on the end of it with two holes in it or ports.
2. Jump programming connector using a suitable jumper wire. Jumping the connector means to use a wire or paperclip bent in the shape of a U to make a connection between the two ports. Be sure you are making contact with the metal inside both ports.
3. System should now lock and unlock doors and activate trunk release to indicate successful entry into programming mode.
4. Press any button on remote one time. System should now lock and unlock doors and activate trunk release to indicate successful programming of remote.
5. Repeat step 4. for each additional remote including working ones.
6. To exit programming mode remove jumper wire and test all remotes.

    Procedure #5 (89-90 Park Avenue)

Obtain all remote transmitters for this vehicle.
1. Ensure ignition is in the OFF position.
2. Lower glove box and remove the inner compartment. You must access behind the glove box. Once removed look in the upper left end and locate the Programming Connector. It will be a plastic connector with two terminals and two wires leading to it. Connector may be retained by a clip.
3. Once located jump the two terminals in the connector with a suitable jumper wire or you can use a paper clip bent in a "U" shape. Once connected properly the vehicle will automatically cycle the door locks to lock and then unlock.
4. Vehicle is now in programming mode. Press the UNLOCK button once on the first remote to be programmed. Vehicle will cycle door locks again to lock then unlock to verify acceptance of the remote.
5. Repeat step 4 to program an additional remote.
6. Programming is now complete. Remove jumper wire from Programming Connector and test remotes to ensure proper programming.

    Procedure #6 (93 Riviera)

Obtain all remote transmitters for this vehicle.
1. Insert key into the ignition switch and turn ignition to the ON position (as far as you can turn before cranking engine).
2. Open the trunk and locate the (VAC) programming connector. It will be a green plastic connector with a single black/white wire running from it. It may be necessary to pull back some trim or carpet to access the connector.
3. Contact the (VAC) programming connector to ground (a metal surface with no paint) using a suitable jumper wire. The connector must remain grounded throughout the programming procedure. Once connected the door locks will cycle automatically to lock and then unlock. The vehicle is now in programming mode.
4. Press UNLOCK on the first remote to be programmed. The locks will automatically cycle to lock then unlock again to show the remote has been accepted.
5. If programming a second remote repeat step 4 for this remote. If only one remote is being programmed you need to press UNLOCK on the same remote and door locks will cycle again.
6. Programming is now complete. Remove ground from programming connector and test all remotes to ensure proper programming.


Habe mir jetzt auch noch mal 2 neue original Schlüßel bestellt

mit Transponder für Wegfahrsperre

weil leider nur 1 Schlüßel zum Auto mit dazu war


http://www.diy-gm-security.com/


Schließzylinder / Door Lock Cylinder

https://www.boltlock.com/locks/lock-cylinder


    Bild

Bild


Bild


https://www.ebay.de/itm/194137827610?ha ... SwfDRf2GFJ


https://www.ebay.de/sch/i.html?_from=R4 ... M+2++Blank


http://mcguirelocksmith.com/service-art ... et-number/


http://www.diy-gm-security.com/


http://www.vatskey.com/


http://www.pekatronic.de/media/products ... 694112.pdf
Zuletzt geändert von Atschi-78-Caprice am Di Mai 25, 2021 9:08, insgesamt 43-mal geändert.
    Bild Bild Bild
Benutzeravatar
Atschi-78-Caprice
Top-Fuel
 
Beiträge: 2234
Registriert: So Jan 24, 2010 18:26
Wohnort: DRESDEN

VorherigeNächste

Zurück zu Restaurationen und Reparaturen

Wer ist online?

Mitglieder in diesem Forum: 0 Mitglieder und 1 Gast

cron